Langcaster Pickups

INSTRUCTIONS!

An instruction sheet is supplied with the Langcaster Pickups kitset.  Here are some additional instructions.

MAKE SURE THE KITSET IS WORKING OUT OF THE BOX FIRST!

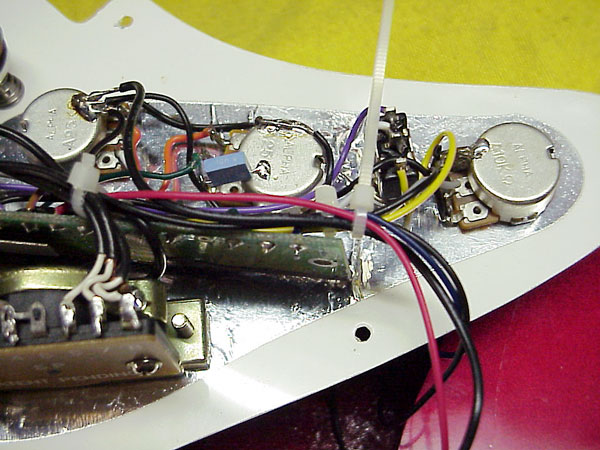
Connect the battery and put a guitar cord in your amp or home stereo input.
Tap on the pickups with a paper clip or small teaspoon to hear the pickups working.
Tap on the pickups and switch the toggle switch for the overdrive on and off and you  hear the sound and noise is a lot louder , the lower pot is setting the amount of Drive volume.
The middle pot is Tone and the first pot is Volume.

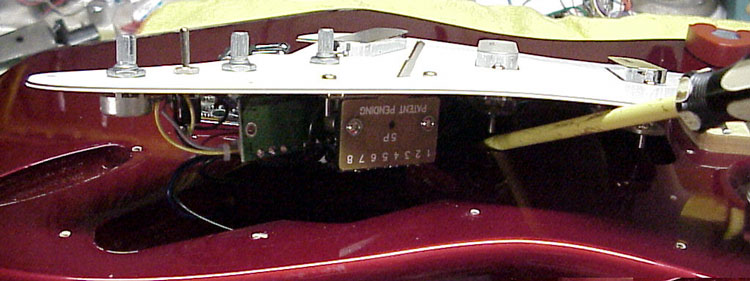
Most buyers of the Langcaster replacement pickups like to keep the original pick guard so the screw holes line up.

HAVING PUT THE KITSET PARTS IN THE ORIGINAL PICK GUARD, TEST FIRST BEFORE SOLDERING!

The kitset supplied is in working order! when you have the parts removed from the guard supplied and placed in your own pick guard.

If you like to use the overdrive that is incorporated on the PC board , you can place this between the Tone and Drive pot.

DRILL A 6.5 MM OR 1/4" HOLE to fit the toggle switch, the Yellow wire on the switch is facing to the edge of the pick guard.

After you have replaced the kitset in your own pick guard , TEST AGAIN! This is to make sure no wire is loose or broken.

Now the installing in your guitar can begin!

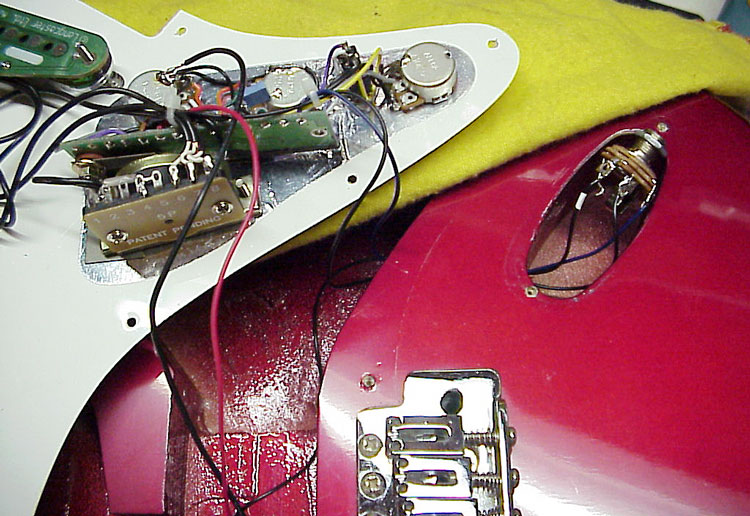
Open the back of the guitar and place 2 springs on the outside on the spring claw,

Most guitars back cavities are just deep enough to hold a 9v battery.
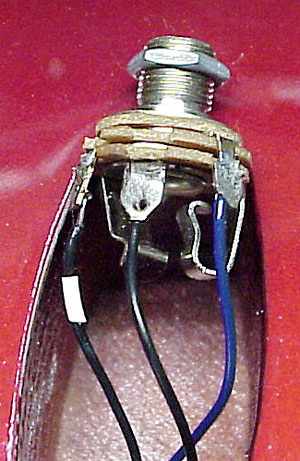
Some people turn over the jack plate in the front as some have nice chrome work on the back of the jack plate. This also gives you space for a battery.

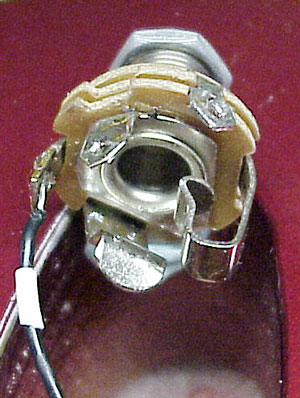
MAKE A NOTE OF WHAT YOU UNSOLDER!
ONLY THE 2 WIRES OF THE BATTERY AND 3 WIRES ON THE JACK AND ONE EARTH WIRE FROM THE VOLUME POT TO THE SPRING CLAW NEEDS TO BE SOLDERED!.

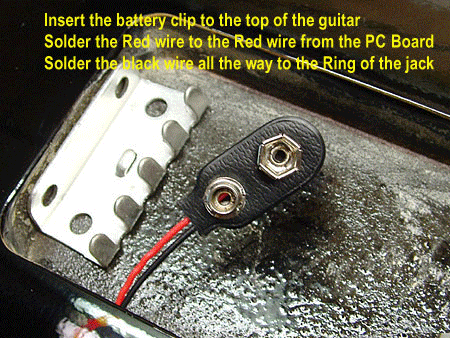
1: Unsolder the battery clip wires from the kitset and place between the springs ( see photo) and feed through the back. Most guitars have a hole for the earth wire that comes from the spring claw anyway.
Put some bits of heatshrink tube over the 2 wires for insulating the soldered connection later.

2: Solder the Red wire from the battery clip to the Red wire from the PC board and slide over the heatshrink tube.

3: Solder the long black wire from the back of the volume pot to the earth wire from the spring claw, you may find that you have to shorten this wire a bit and slide a heatshrink over it first!.


SEE THIS SLIDE SHOW! 10 SEC INTERVAL PHOTOS


4: Unsolder the 3 wires on the jack but make a note first! ,


You see a Blue wire on the tip lug, a Black wire on the earth lug and a Black wire with a little bit of heatshrink tube round it on the ring lug of the jack.
NOTE! It is best to leave the Black wire from the battery with the bit of heatshrink round it, connected to the jack. Only disconnect it in the middle where at present the battery wire is soldered to the black wire from the ring of the jack with the heatshrink round it.

This Black wire is from the battery and connected to the middle of the stereo jack lug and works as a switch when you put the plug from the guitar cord in the jack.


Place a towel on the guitar and the kitset on top of the guitar to stop from scratching ( see photo).

5: Place the jack in the jack cavity ( see photo) and solder back the 3 wires back after you have feed them through the wall of the PU cavity to the jack cavity.

The Blue wire is the + and input wire and is connected to the tip of the jack.
The Black wire is going the earth lug of the jack that is the outside wall of the jack input.
The Black wire with the bit of heatsink round it ( see photo) is the one from the battery.

NOW YOU ARE DONE with soldering.


6: Now put some tidy strips round some wires as on the photo.


Connect the battery and a cord to your amp and test again before screwing the pick guard in place.

Now the tricky part: closing the guard on the body may be a bit of a challenge as the pickup wires may not be direct into the cavity. A tip is to place the guard where it has to go and lift up a little to see where the wires need to be pushed away in the cavity. Use a long screw driver or a fine artist brush for this.

When all is in place test again!!


NOTE!!

You may find that the 2 springs may need to be a bit tighter and screwed a bit deeper in the body.

Always take the cord out the guitar to save power when you stop using the guitar. You may have up to 800 Hr of playing time before the overdrive sounds a bit funny. This is a sign to replace the battery.

TIP:
As you know this kitset has a pre-amp with an output of 2.2 V. That means you can play the guitar directly into a mixer or PA amp or power-amp, or into your home stereo with great results.
You can use 100 m cable with out loss of sound or direct into your sound card in a computer.

In the back of a lot of guitar amps you have an input " Power Amp input".  Try the guitar into this, It disconnects the control panel in the front of say, a Fender combo amp, and you have the real sound the Lo-impedance pickups produce.

We have some players only using a small mixer / line in and this going to a power stereo amp with a 15" speaker cabinet on one channel and a cabinet with 12" speakers over the other channel with stunning sound made possible as the Lo's have a wider frequency than all other pickups on the market.
Happy Rockinnnn
Joh Lang